Time Estimate
10 mins
There are three parts to configuring your PLP service; creating a collection in your Shopify Admin Panel under Products, setting up the XSearch Experience in the XGEN platform, and pasting the Experience ID into the Shopify App Block.
1. In Shopify Admin Dashboard
Create a collection
Visit the “Products” page in your side navigation and choose “Collections”. Create a new collection or verify the URL from an existing collection you already have. Fill in the appropriate details and choose the theme template.

Match the URL Handle and XSearch Keyword
At the bottom of the collection creation page is a “Search engine listing” section. Make sure the URL Handle matches the XSearch Keyword you will create in the XGEN platform.
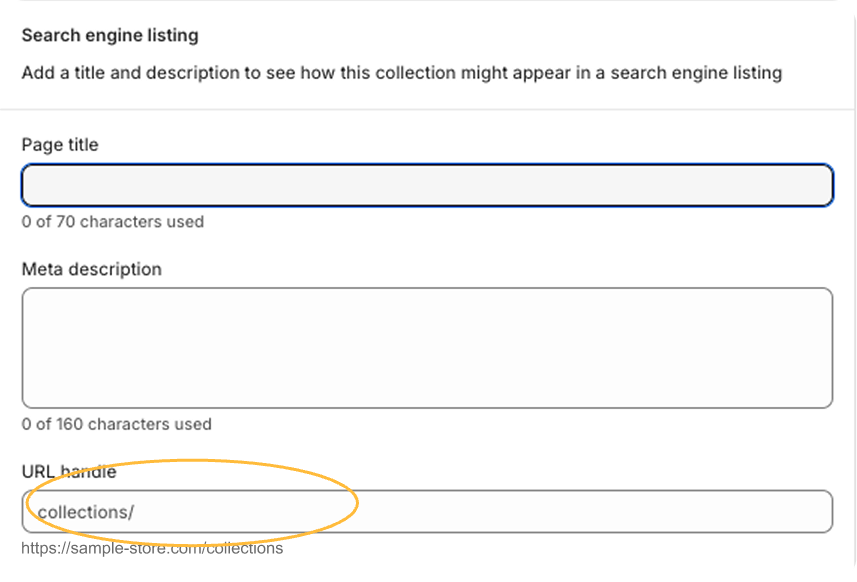
Important Set Up Note
The collection page title is separate from the URL Handle. Make sure the URL handle is name properly.
The XSearch Keyword should be written with spaces in place of any hyphens. (Ex: the shopify collection URL should read https://samplestore.com/collections/amazing-first-collection and the XSearch Keyword should read: “amazing first collection”)
2. In XGEN Platform
Your Product Listing Page (PLP) will be driven by an XSearch Keyword and an XSearch Experience. This is a two step process that requires navigating between two to four separate pages within the XGEN Platform.
Create an XSearch Keyword
In order to restrict the products shown on a Product Listing Page, we need to create an XSearch Keyword that holds that constraining logic, pinning, and sort order. Please reference the full overview of the XSearch Keyword feature. If you are creating a PLP for a specific collection or campaign, you can build the logic for that campaign using conditions and product attributes from your catalog. Within an XSearch Keyword, and therefore within this PLP experience, you can define the following attributes:
Expiration date
Add Synonyms
Pin Specific Products
Exclude Specific Products
Control Sort Order
And more.
Reminder
This keyword must match the URL Handle of the collection name in which it resides, replacing the hyphens with spaces in XGEN.
Create an XSearch Experience
After you’ve created an XSearch Engine and a Merchandising Rule, you can connect that engine and Merchandising Rule to an XSearch Experience.
The filter menu that appears on a PLP is determined by a facet. The facet that is sent along with the Keyword response is determined by the Merchandising Rule inside the experience.
Copy your Experience ID
After saving your experience, the Experience Information section at the top of the page will refresh and display an Experience ID. Click the copy icon next to the Experience ID for use in the Shopify Admin Theme.

3. In Shopify Theme Editor
Open Theme Editor
In your Shopify Admin dashboard, choose a theme to customize. It can be your public theme or an archived one.
Open a Collection Page
In the side bar menu called “Sections,” scroll down to the area of your theme editor called “Template”
.gif)
Add Section
Click the “Add Section” button and select the Apps option. In that menu, select “XProduct Listing” as an option.
Paste your Experience ID
In the field at top of the page, please paste the Experience ID you copied from the XGEN Platfom.